Introduction
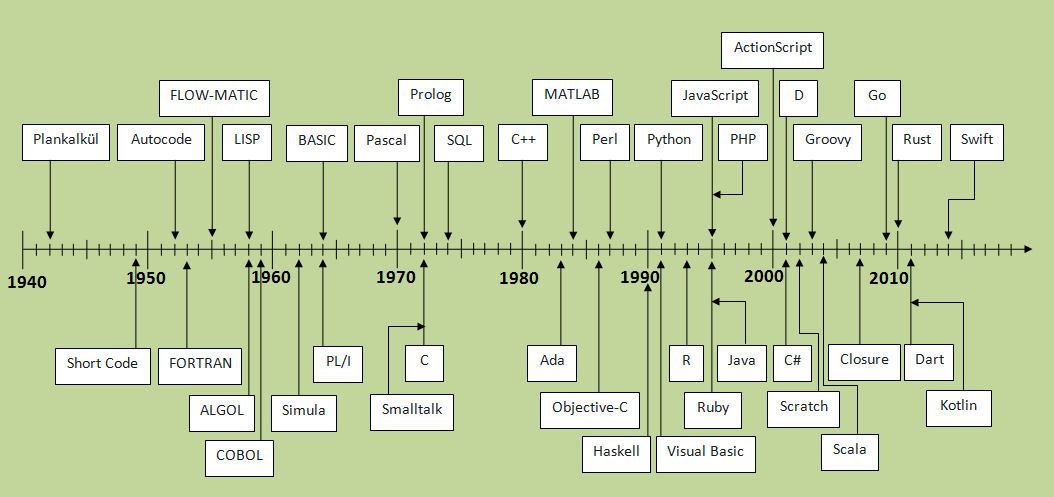
In this module you'll Explore the history of programming languages, how to use the textbook and Python resources, install the Python language, install Visual Studio Code (an Integraded Development Environment (IDE)), update its settings and preferences, discover how write a simple program to submit in Canvas, and respond to the scoring feedback.
Install Python
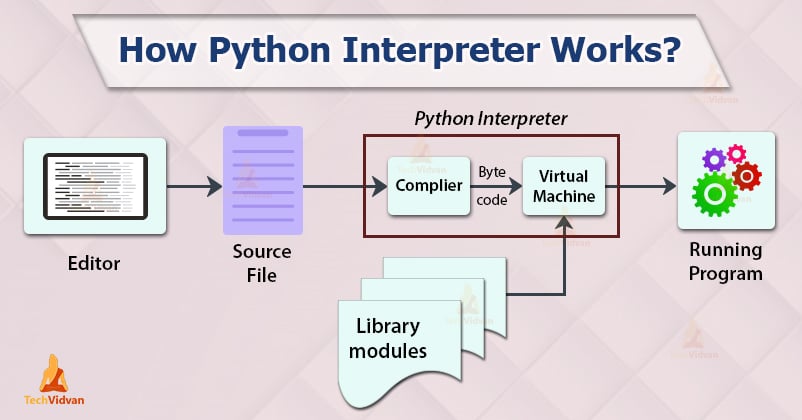 The Python Interpreter
Read about how to use the Python language on your computer or in the cloud. Install the most appropriate version of the language, depending on your system version:
- Microsoft Windows
- Apple MacOS
- Linux
- Chromebook will use the OSU Citrix Server.
- Trouble with those options? Use the OSU Citrix Server.
Upgrade to version 3+
So that we can take advantage of Python add-ons/modules in the future, you may need to update your computer's version of Python. For example, MacOS cames installed with version 2 or higher, but version 3.10 is avaiable now.
In the VS Code Terminal, type python --version to see what version you have working.
To update, review options at Python 3.10.6 and follow instructions there to make the update.
After checking VS Code's terminal and your computer's terminal, the older, previous version is printed, which would imply the software installation is incomplete. If that is the case for you, then Follow instructions at the HitchKiker's Guide to Python:
- MacOS
In the MacOS Terminal (rather than VS Code's Terminal), check to see if you have Homebrew installed by typing:brew --versionIf so, then install the Python update with:brew install pythonYou may need to run:brew update - Windows
First, install Chocolately, which will allow you to easy work with Python and its related packages/libraries. Once installed, use a Windows terminal to install Python with:choco install python. And finally, check to ensure the PIP package is up to date by typing:python -m pip install -U pip - Linux
Start by confirming which version of Python3 you have installed on Ubuntu, and use sudo to install updates, if any:$ sudo apt-get update
$ sudo apt-get install python3.6
Install an Editor
1. Install Visual Studio Code
![]() VS Code is (free) so you can
write programs in files,
make commands via a terminal/console, and
add extensions to improve complexity.
VS Code is (free) so you can
write programs in files,
make commands via a terminal/console, and
add extensions to improve complexity.
After clicking the link to VS Code, your platform will be detected automatically and show in the blue Download button. Use the down arrow to view the list of options, and click the Stable download icon to launch the installation for your platform. Once installation is complete, add the VS Code application icon to your Mac Dock or Windows Taskbar.
2. Choose a Theme and Font Size
The VS Code app comes with a default dark theme, which may or may not be easy on your eyes. If you prefer other levels of contrast and color combinations, try out the built-in themes and/or install and enable others via the Extensions menu. Screenshots in this tutorial are using the Gruvbox Concoctis Light Medium theme from wheredoesyourmindgo.
- From the Code > Preferences > Color Theme menu. Select from the Dark, Light, and High-Contrast themes listed. Leave on the one you like the best.
- From the Code > Settings menu, search for font size and change it to 14 (or a size that suits your eyes best).
- From the Settings menu, search for auto save and set the afterDelay feature to 1000 (or whatever timing you prefer).
- Come back to this area later to update text-editing conventions that you prefer, such syntax highlighting, folding, hover/hints, tab size, word-wrap, disable minimap, etc.
- Learn more: VS Code shortcuts and tricks that I wish I knew sooner.
3. Add Extensions
Click the Extensions icon on the left menu bar and add the following extensions:
- Python
- A theme that improves readability (optional)
4. Create a workspace
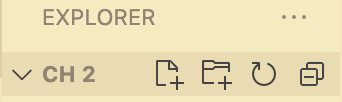
You can create folders and files for a project (called a Workspace) in a variety of ways.
A. From the Mac Finder or Windows Explorer on your hard drive:
- Make a folder in the Finder/Explorer window.
- Drag the folder to the VS Code icon to open the Workspace.
- Use the + file icon to add files to the Workspace folder.
- Click the file from the VS Code's File Explorer pane to edit and save.
B. From inside VS Code's File Explorer pane:
- Code → New Window → Open Folder.
- Navigate to the Documents folder on your hard drive and create a course folder → module folder.
- Use the + file icon to add files to the Workspace folder.
- Click the file from the File Explorer pane to edit and save.
C. From inside VS Code's Terminal:
- Terminal > New Terminal.
- Type mkdir foldername.
- Type cd foldername to change to that new directory/folder.
- Type touch filename.html to create a file.
- Click the file from the File Explorer pane to edit and save.
Choose an interpreter
VS Code will need a Python Interpretor to run Python 3, and it will ask you to choose one.
This prompt will be located on the bottom colored bar, typically in blue or gold with a warning triangle.

Click it, or use ⌘Shiftp or cntrlShiftp
to select an interpretor: Python: Select Interpreter
then choose the Python Version 3.8.2 64-bit option.
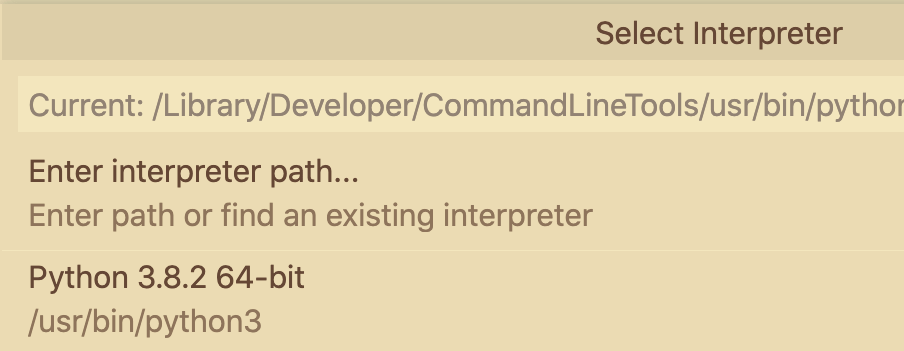
The version selected will then show up in blue below the terminal, like this:

Terminal Command Line
Your computer is installed with an application that allows you to type commands to tell it what to do, such as navigate through folders and files, Create, Read, Update, and Delete folders and file (CRUD), and change the permissions of folders and files to increase or decrease security. It can also be used to install libraries/dependencies, run your apps/sites, view console log output, debug problems, and run multiple terminals at once.
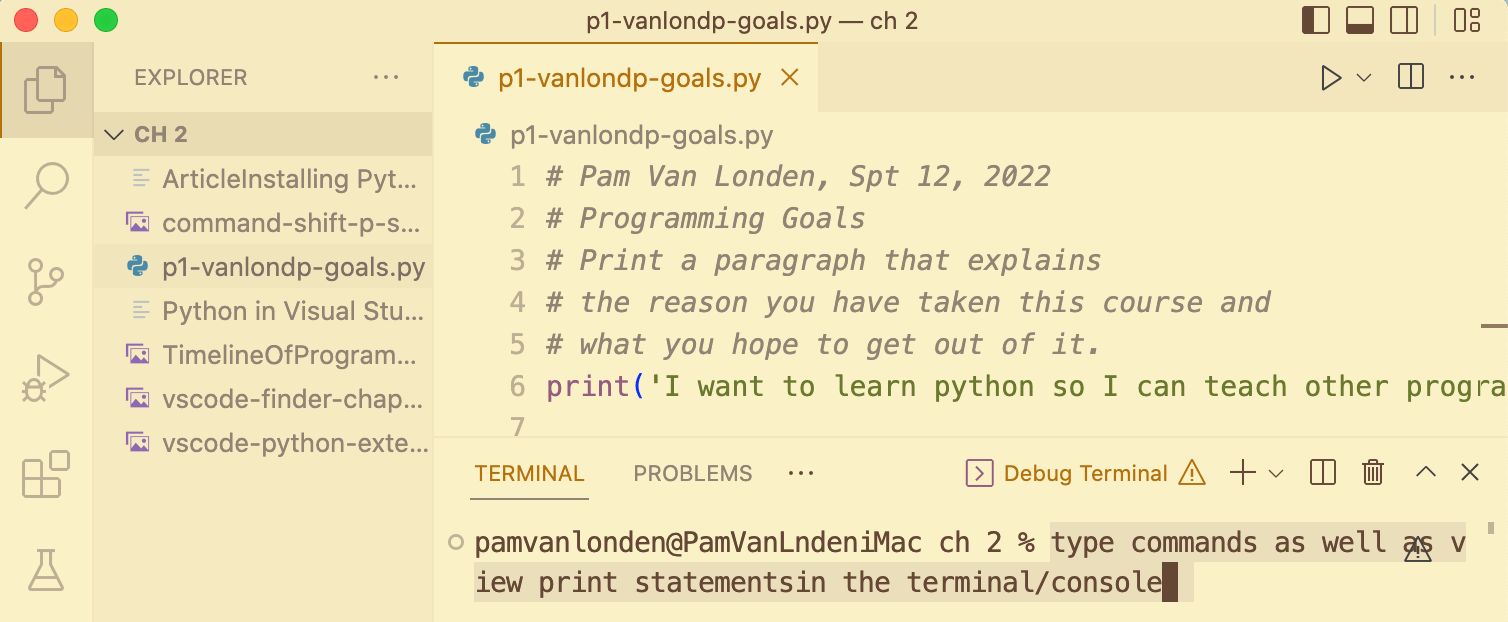
For this course, you'll use Python in the VS Code Terminal to give your assignments some commands.
Terminal windows in VS Code can be accessed in these ways:
- From the Terminal menu → New Terminal.
- With the Control tilde buttons: ^ ~ keystroke.
- By dragging up from the bottom of a file editing window.
- From the File Explorer, right-click on a file/folder and choose Open in Integrated Terminal.
Close the running terminals at the end of each working session using Cntrlc, so they don't interfere with the next day's work.
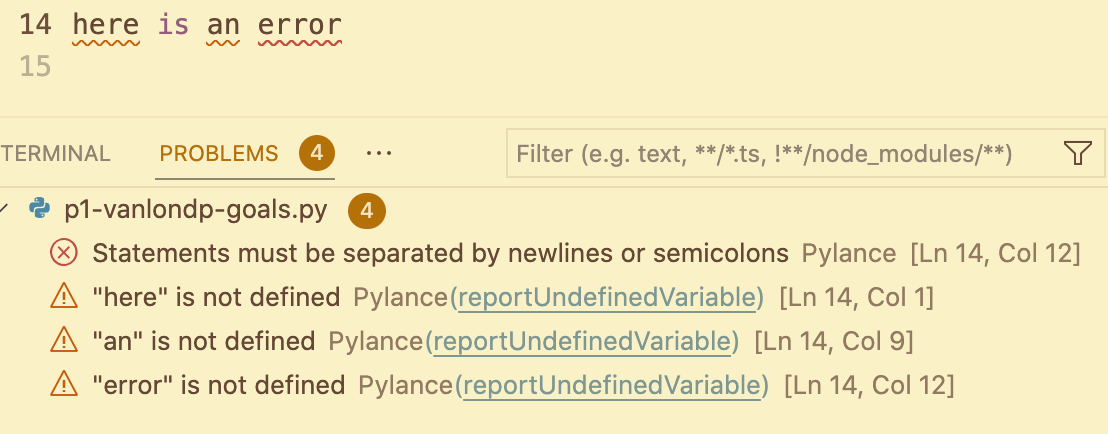
Debugging
The Terminal's Problems tab provides the number of coding issues in the tab and lists them below. Click it to view their line numbers.
The Terminal's Debug Console tab automatically provides support for Python. To use it:
- Click the Run Debug icon on the left menu.
- Click the Run and Debug button.
- Choose the language (Python) from the dropdown list.
- View the Debug Console or Problems tab in the Terminal. If the debug messages are too vague, consider adding related extensions or methods.
Share your Code in Zoom Help Sessions
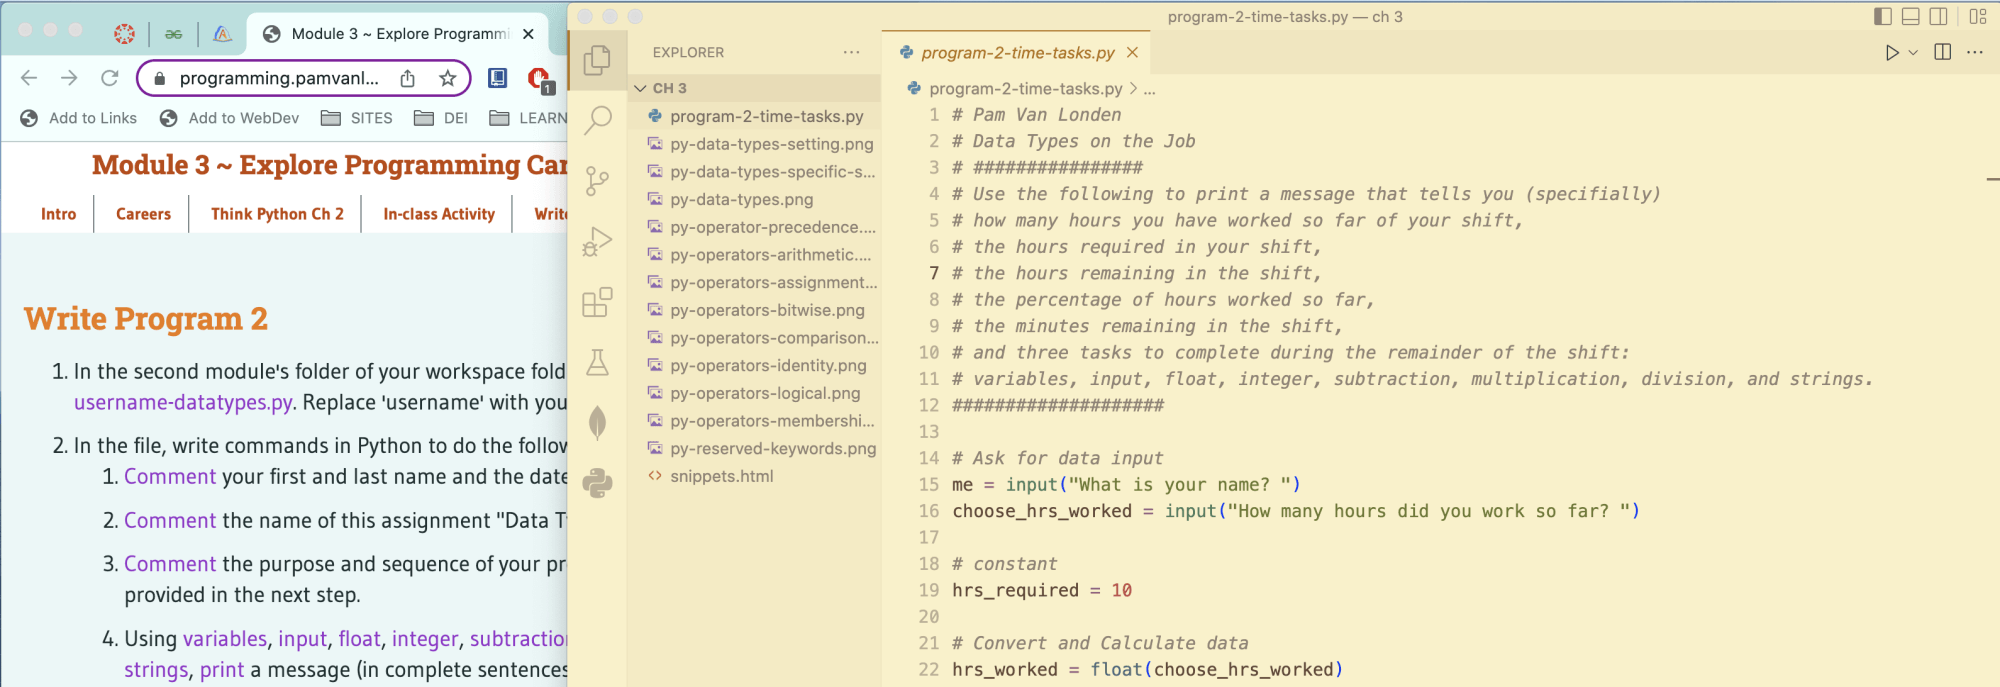
When sharing your Code during Zoom Help Sessions, set up your screen so the Instructor or TA can quickly assess your output and code:
- Place the browser window (localhost) on the left ⅓ of the screen.
- Place the VSCode window showing your code on the right ⅔ of the screen.
- From the Code > Settings menu, search for font size and change it to 14, or use ⌘+ (Mac) or Ctrl+ (Win) to increase the font size from the keyboard.
In-class Activity
In small groups, collaborate in a Google Sheet or Excel file named "Python Concept Reference Sheet" and add the names, definitions, and examples of the different programming language concepts.
Also include a column to describe what the new term reminds you of. If it reminds you of something from personal experience, nature, math, or other programming languages, etc., list that concept. For example, if you know some JavaScript, list the name of the same concept.
| Concept | Description | Example | Reminds me of... |
|---|---|---|---|
Here are terms to understand from Chapter 1 of the textbook:
- algorithm
- high-level language
- low-level language
- Natural Language
- Formal language
- token
- structure
- parsing
- semantics
- Interpeter
- Compiler
- Shell mode
- Program mode
- activecode
- input
- output
- math and logic
- conditional execution
- repetition / recursion
Share your file
To share the new spreadsheet file with your group mates, use the following procedure:
Windows or Microsoft Account
Share Microsoft Office files from the OSU OneDrive cloud drive.- Login to your OSU OneDrive account from the browser.
- Drag the file from your hard drive to the OSU OneDrive file list in the browser to transfer it there.
- Beside the file name in the list, click the
 Share icon:
- Choose the settings provided in the screenshot below:

- Copy the link so you can provide it your group mates:


Google Account
Share Google Suite files from the OSU Google cloud drive:- Login to your OSU Google Drive.
- With your file open, click the Sharing button at the top right of the screen. Or, if the file is not open but listed in the Drive, right-click it to choose the Share menu.
- Click the Get Link box to update the OSU Settings and copy the link:

- Or, share with just your group mates using their ONID email addresses.

Write Program 1
- Create a new workspace folder (using one of the methods in the Install VS Code tab).
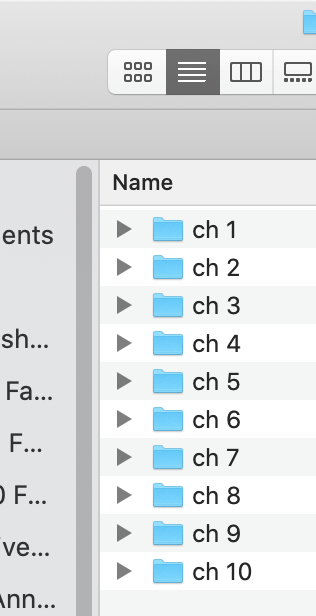
- In that folder, add folders for 10 modules.
- In the first module's folder, make a new file named p1-username-goals.py. Replace 'username' with your ONID username.
- In the file, write commands in Python to do the following:
- Comment your first and last name and the date.
- Comment the name of this assignment "Programming Goals".
- Comment and Print a paragraph that explains the reason you have taken this course and what you hope to get out of it.
- Comment and Print the result of a calculation of a set of numbers using addition, subtraction, multiplication, and division.
- Save the file using cntls or ⌘s.
- Run the program using one of these methods:
- Click the run arrow ▶ at the top right of the editing screen.
- In the terminal, type: python p1-username-goals.py
- Right-click on the file in the file list (or from in the file) and choose Run Python file in terminal.
- Backup your work to a cloud drive and/or USB stick drive.
Submit Program 1
Zip the .py file and upload it to the Module > Assignment in Canvas. The Instructor/TA will download the zip archive and run your .py file to score it.
- Mac
Select the file(s) and right-click to choose Compress files. - Windows
Select the file(s) and right-click to choose Send to... → Compress (Zipped) archive. - Chromebook
Select the file(s) and right-click to choose Zip selection.