Introduction

In this chapter you'll explore how software can be full of bias bugs and how diversity, equity, and inclusion in the industry helps solve the problem. You'll look at the contributions of diverse workforces, such as women, ethnic groups, immigrants, and the the differently-abled.
Then, you'll write a program about time and explore how to debug it using a variety of methods.
Biased Software is a Problem
OSU's own Anita Sarma co-authors this recent Association for Computing Machinery journal article about why software bias is a problem.
Diversity, Equity, and Inclusion are the Solutions
One focus of the industry is to improve the diversity of programmers/designers to ensure all their hard work can be accessed and used successfully by everyone; not just experienced males (who are the premominant group of programmers). Another issue relates to the young, women, and other marginalized groups being disouraged from joining the ranks of programmers, and they ultimately miss out on higher salaries.
Explore these topics to understand more:


In-class Activities
Update your Python Concept Reference Sheet
In your existing small group, collaborate in your existing Google Sheets or Excel file to describe the Libraries/Modules and Error Types presented in chapters 3 and 4. Continue to add to the list as you progress through the chapters.

Make a Customizable Triangle
Work together in small groups to draw a triangle ‣ with Turtle code, as per the Extend this program … section of Activity: 4.2.6 ActiveCode
Start by discussing how you would write pseudocode comments that describe each step of the program.
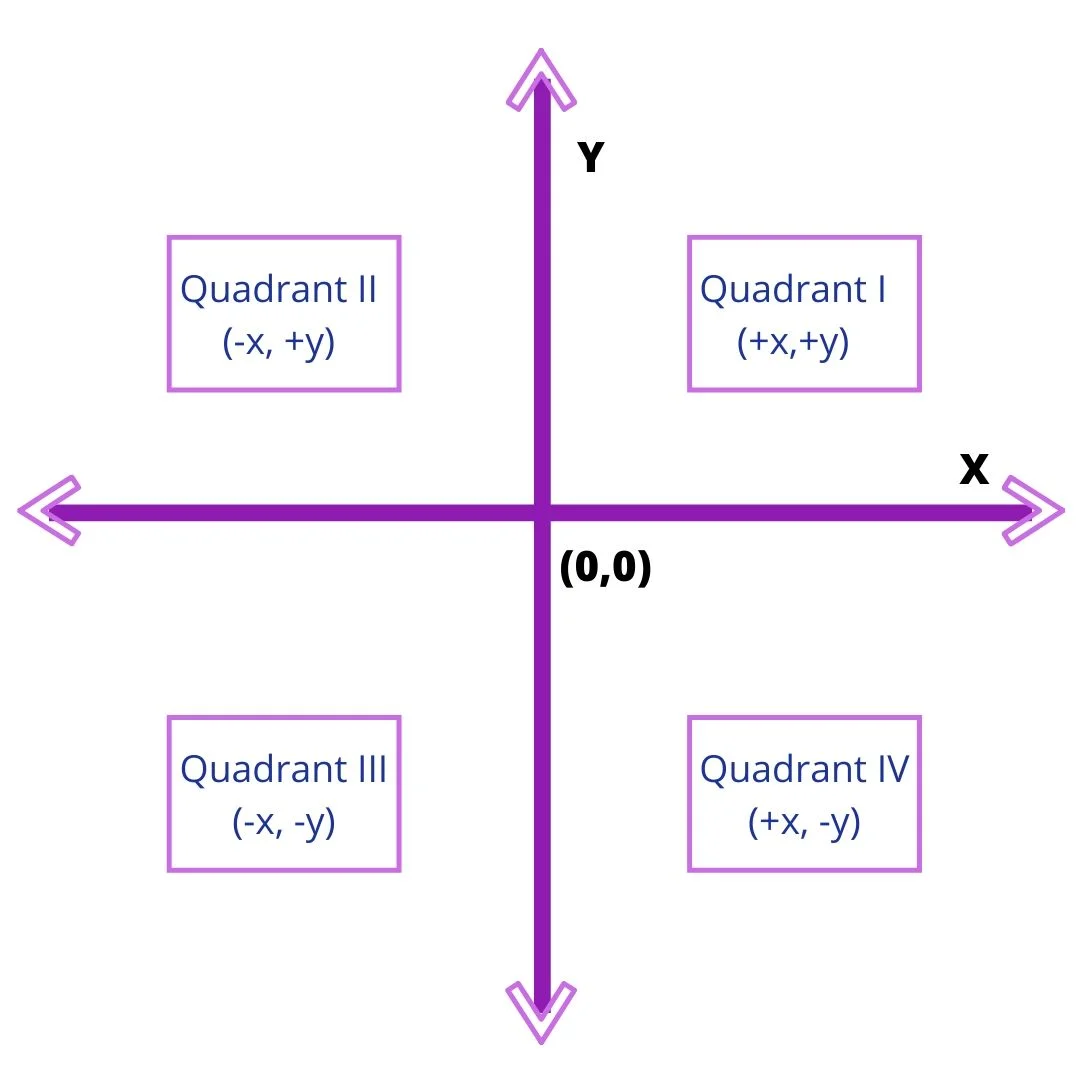
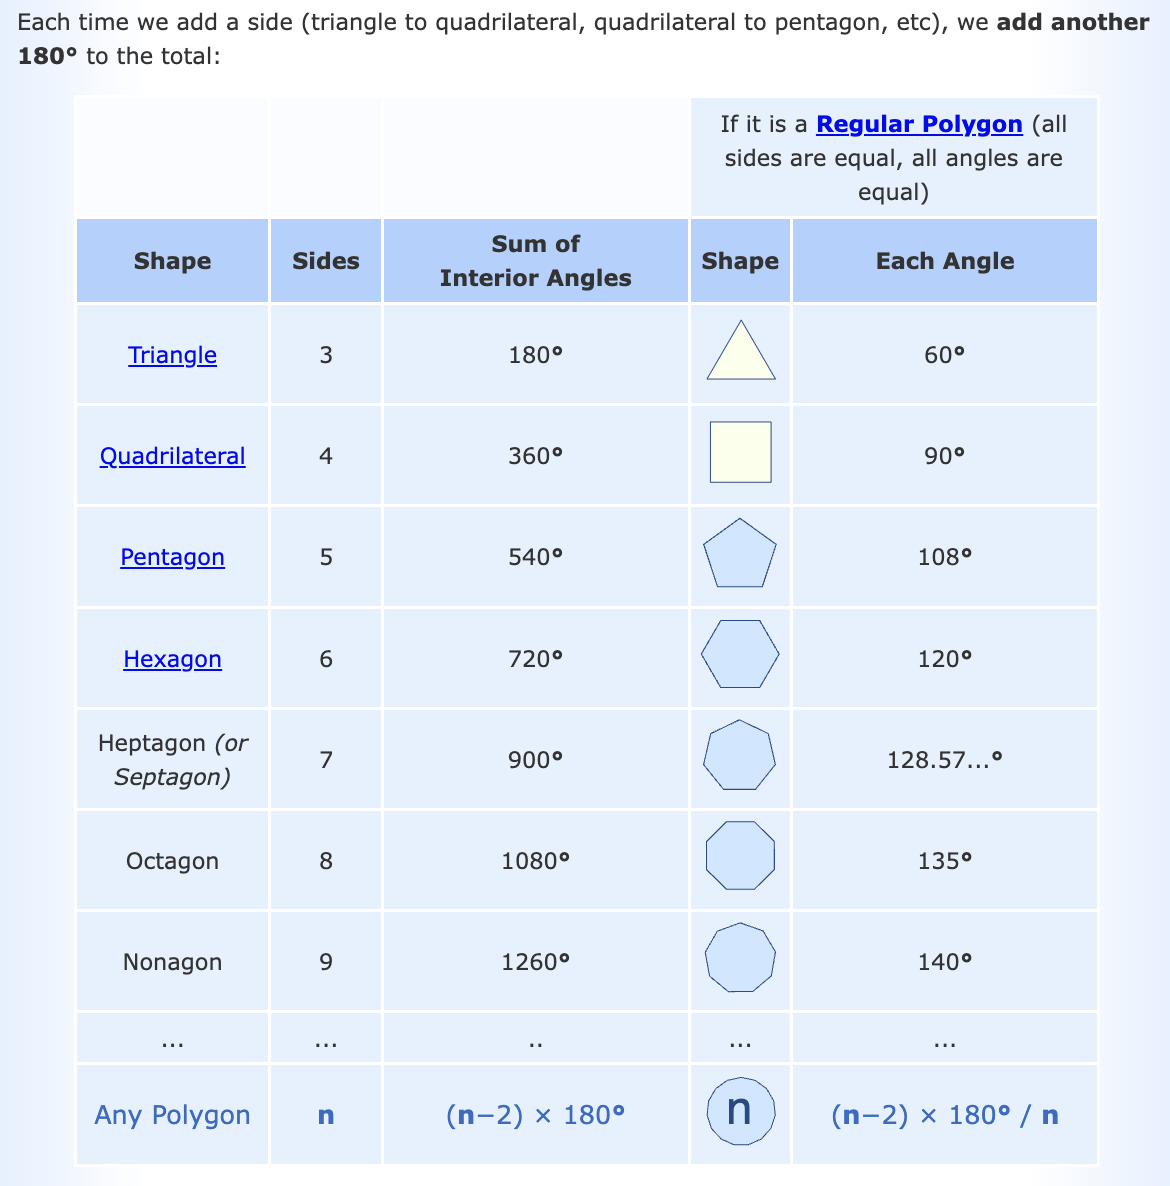
Refer to the following guides to aid your understanding:
Write Program 3
- In the fourth module folder of your workspace folder, make a new file named p3-username-tesselations.py. Replace 'username' with your ONID username.
- In the file, write commands in Python to do the following:
- Comment your first and last name and the date.
- Comment the name of this assignment "Tesselations".
- Comment a description of your program (a sentence or two in your native language).
- Define the canvas to fit in the top left corner of your window and a width and height of 400 (pixels).
(This will improve your ability to see what your program is doing as well as allow us to score it quickly.)
surface.setup(400, 400, 0, 0) - Add your name and title to the canvas using
turtle.title("Name and Title") - Write pseudocode comments that describe each step of your program.
- Include the following code:
- Ask for input for the background color of the canvas.
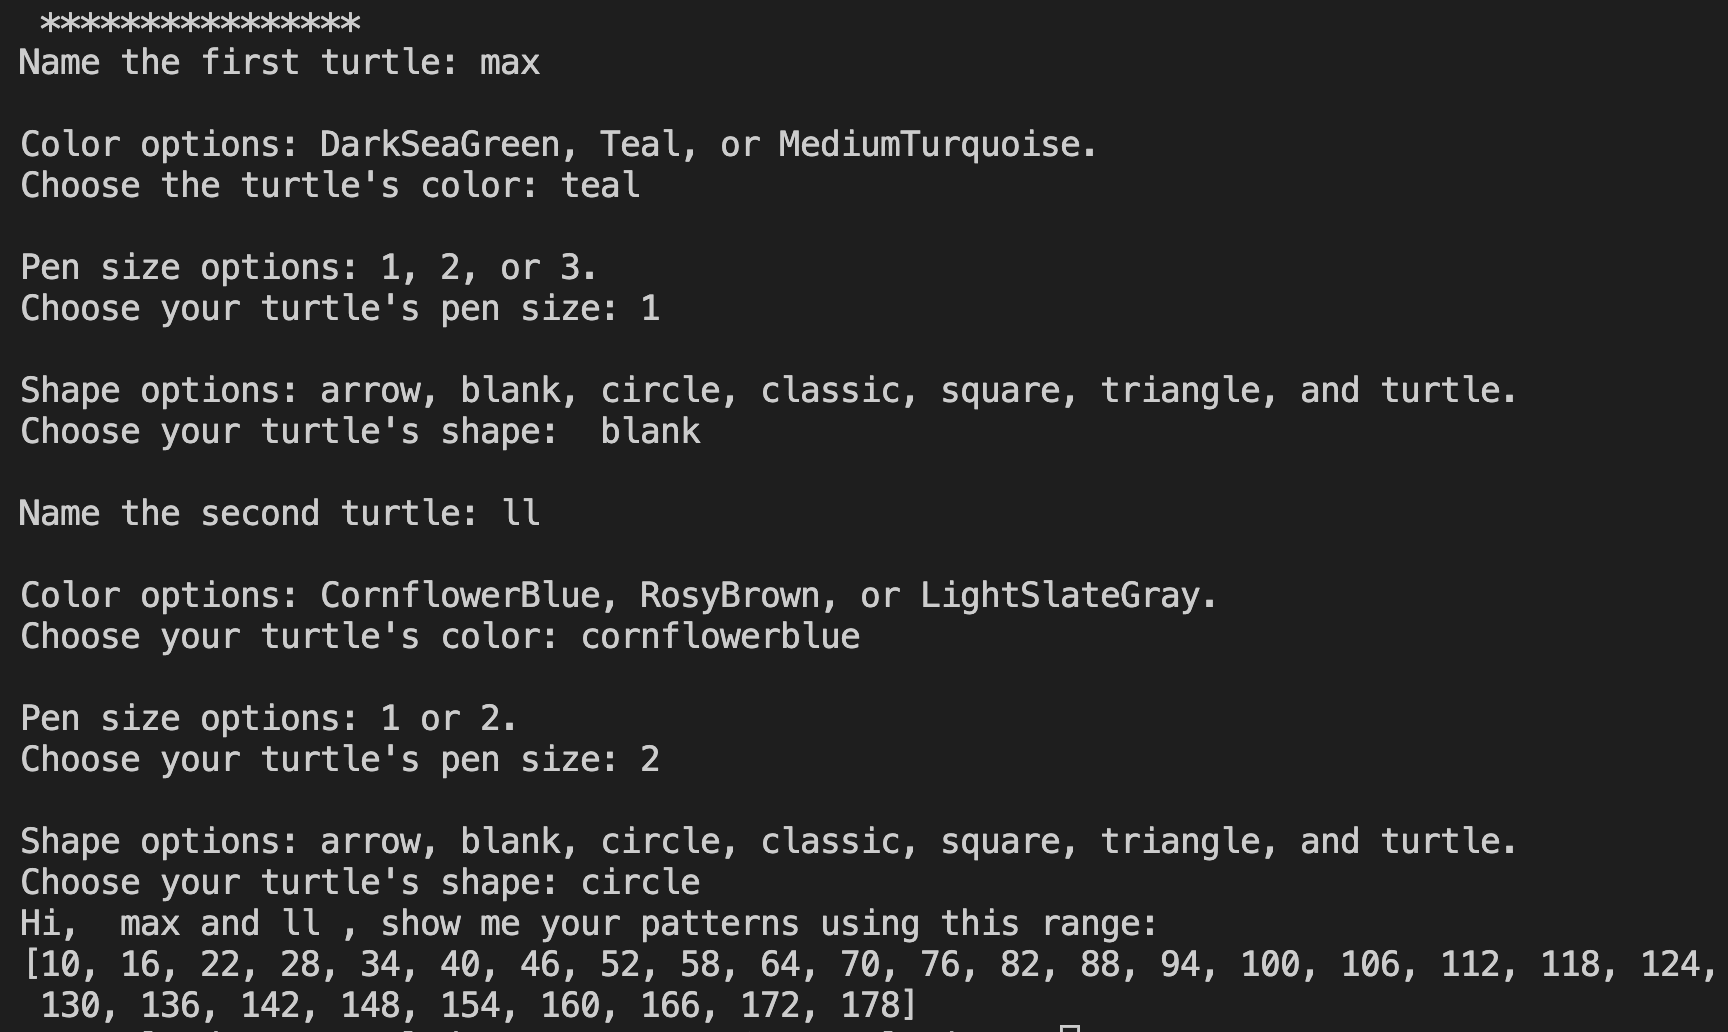
- Ask for input for at least two turtle characters. Ask for their names and for colors, size, and shape characteristic. Optionally, you can ask for other characteristics, such as speed, as noted in the Python Turtle Documentation.
- Optional: to help ensure your inputs work, you can print their values in a hello message (using the original variable name). Note: Turtle() object does not include name as a parameter like it does for color, pensize, shape, and speed.
- Use each turtle's characteristics input to draw and/or stamp the shapes/lines within the 400 pixel canvas using one or more for loop(s) with ranges.
- Colors can be colornames, hexidecimal, or RGB. Refer to the W3Schools.org Color Groups Chart.
- Provide guidence to the user when asking for input. Let them know which color modes, sizes, shapes, and speeds are available.
- Save the file using cntls or ⌘s.
- Run the program using one of these methods:
- Click the run arrow ▶ at the top right of the editing screen.
- In the terminal, type: p3-username-tesselations.py
- Right-click on the file in the file list (or from in the file) and choose Run Python file in terminal.
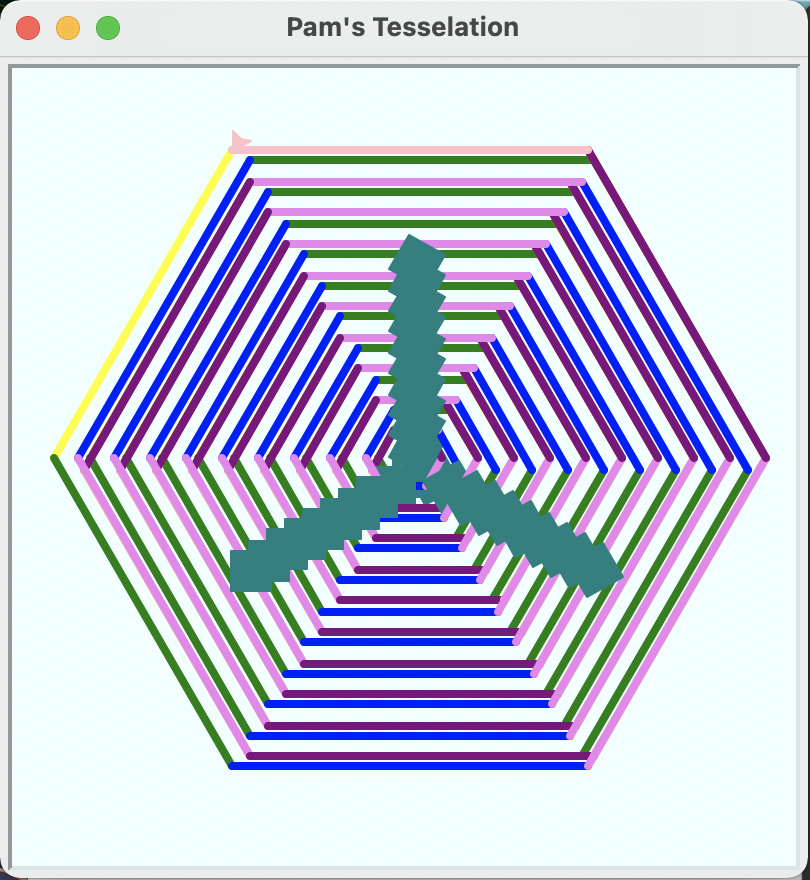
- Take a cropped screenshot of the final step of your tesselation:
- Windows:
 Start → All Programs → Accessories → Snipping Tool
New → Rectangular Snip to select just the portion of the window and screen you need to show.
Or, newer Windows computer systems may use the Snip and Sketch tool's WindowsShifts keystroke.
Save the file as .png and move it to your module folder.
Start → All Programs → Accessories → Snipping Tool
New → Rectangular Snip to select just the portion of the window and screen you need to show.
Or, newer Windows computer systems may use the Snip and Sketch tool's WindowsShifts keystroke.
Save the file as .png and move it to your module folder.
- MacOS:
⌘Shift4 to draw a marquee around just the canvas/window of your app. Or use the Preview application to capture, edit, and save the file. Applications → Preview → File → Take Screenshot → From Selection.
Drag the crosshair cursor over the area you want to capture.
The image saves in .png format.
Edit as needed.
Or, you can use the searchsearch bar on the top right of the Finder to search "screenshot."
The screenshot crosshair cursor will pop up automatically.
Select the area you want to capture and it will save a file to the Desktop.
Move the resulting .png file to your module folder.
Applications → Preview → File → Take Screenshot → From Selection.
Drag the crosshair cursor over the area you want to capture.
The image saves in .png format.
Edit as needed.
Or, you can use the searchsearch bar on the top right of the Finder to search "screenshot."
The screenshot crosshair cursor will pop up automatically.
Select the area you want to capture and it will save a file to the Desktop.
Move the resulting .png file to your module folder.
- Chromebook:
CtrlShiftOverview: The screenshot crosshair cursor will pop up, so you can select just what is needed. Move the resulting .png file to your module folder.
- Windows:
- Backup your work to a cloud drive and/or USB stick drive.
Limitations
- Do not use white or black. (This will allow you to experiment with color options.)
- Do not copy any existing for loops. Write new loops.
- Turtle canvas/window must be no wider than 400px.
Submit Program 3
Select the screenshot.png and the .py file (using the control/command or shift key) then zip them together as one .zip archive. Upload the .zip file to the Module > Assignment in Canvas. The Instructor/TA will download the zip archive and run your .py file to score it.
- Mac
Select the file(s) and right-click to choose Compress files. - Windows
Select the file(s) and right-click to choose Send to... → Compress (Zipped) archive. - Chromebook
Select the file(s) and right-click to choose Zip selection.